
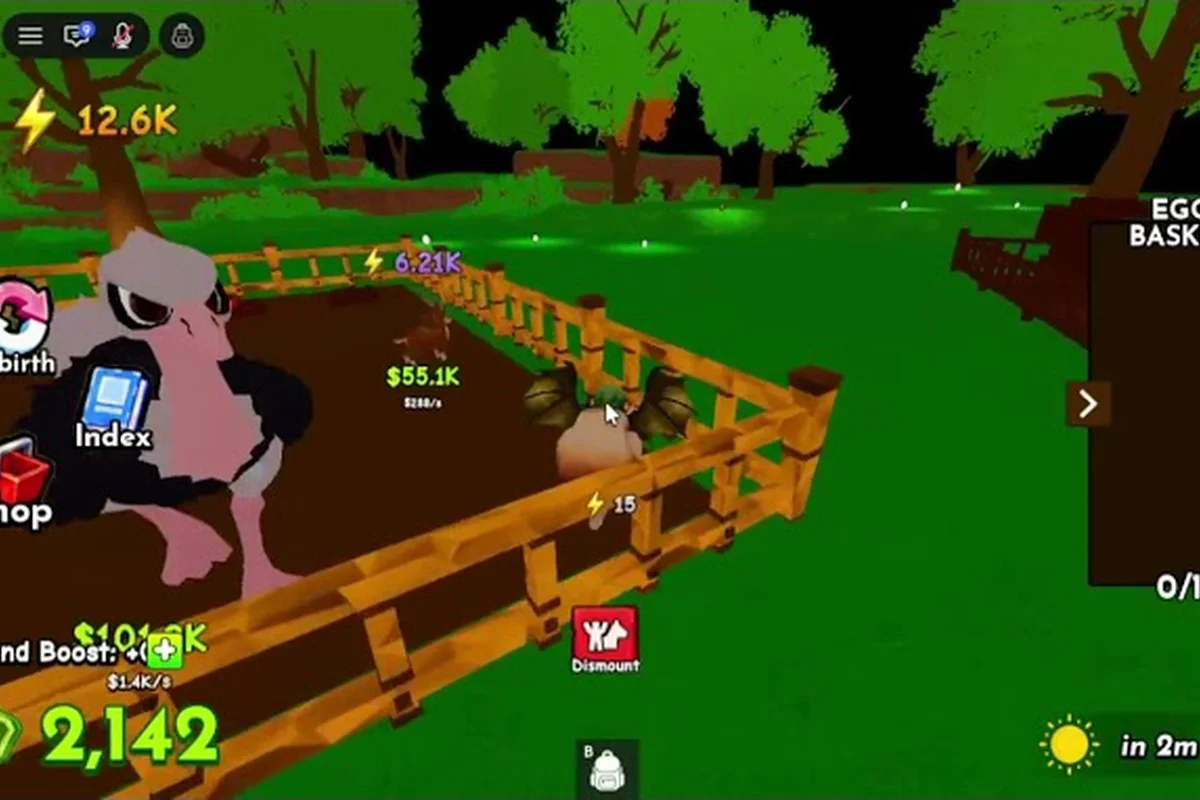
Ride A Pet is a Roblox game where the only thing standing between you and the next egg is speed, and this ride a pet full guide is built to take you from a freshly hatched starter mount to the fastest pet on the map without wasting hours on trial-and-error. According to the "Strongest pet gameplay in Ride a Pet", the entire loop is built on one simple promise: rarer and faster pets come from rarer eggs, so every minute you spend learning the loop pays back in more travel speed and better hatches.
The reason this guide exists is that the game has no combat, no PvP, and no leaderboard to climb — your only score is the displayed speed of the pet you are riding, and how fast you can replace it with a faster one. That single number decides how quickly you reach far egg nests, how many hatch cycles you complete per hour, and how soon you break into the high-tier roster. Most players who bounce off the game in the first 30 minutes are not stuck because of bad luck; they are stuck because they have not yet learned the three habits that make the loop work — repeat-hatching, ruthless culling, and a clear rule for when to switch mounts.
This ride a pet progression guide covers every layer you need: how eggs and rarities actually map to speed, how to build a pet roster instead of hoarding duplicates, the travel-speed math that decides which pet you should be riding at any given moment, and the loop from a starter mount to a top-MPH mount. You will also get a clear answer to one of the most asked questions in the community — how to equip pets, because the menu is not obvious the first time you open it.
Egg Rarities and What They Actually Mean for Speed
Before you can build a strong roster, you need to understand what the egg color in front of you really represents. The pet that pops out of an egg has two numbers worth caring about: the rarity label (Common, Uncommon, Rare, Epic, Legendary, Mythical) and the base speed shown on its card. Community testing shared across YouTube guides makes it clear that rarity and speed are correlated but not the same thing — a fast Epic that you actually use will outperform a slow Mythical that just sits in your inventory as a trophy.
The Rarity-to-Speed Mapping
Here is a general overview of how rarity tiers tend to map to displayed speed, based on community reports from players grinding the same nests for hundreds of hours. Exact numbers are tuned by the developer, so treat these as a working baseline rather than a guarantee.
| Rarity | Approx. Speed Tier | Hatch Source | Practical Use |
|---|---|---|---|
| Common | Baseline 1x | Basic nests, starter egg | Tutorial only — replace fast |
| Uncommon | ~1.2–1.4x | Tier-1 nests | Early traversal, short routes |
| Rare | ~1.5–1.7x | Tier-2 nests | First "real" mid-game mount |
| Epic | ~1.8–2.1x | Tier-3 nests, occasional upgrades | Workhorse for most of mid-game |
| Legendary | ~2.2–2.6x | Rare nests, luck-based drops | Map-coverage workhorse |
| Mythical | ~2.7x and up | Hidden nests, event eggs | End-game travel ceiling |
The headline takeaway is that the jump from Uncommon to Rare is the most important speed bump in the entire game, because that is the moment when distant nests stop feeling like a chore. The jump from Epic to Legendary matters most for raw travel time on long routes, while Mythical pets are more about completing your collection and chasing the leaderboard-style "fastest pet" badges the community shows off in showcase videos.
Why a Mid-Tier Pet With High Speed Beats a Top-Tier Pet With Low Speed
The official game description frames pets as travel tools first and collectibles second, and that framing is the single most important strategic lens in this ride a pet strategy guide. A player riding a 2.0x Rare across the map will reach the next egg nest in noticeably less time than a player riding a 1.6x Mythical they refuse to swap, simply because displayed speed compounds across every second of traversal.
If you want a tighter rule of thumb: keep the pet with the highest displayed MPH mounted at all times, and treat rarity as a quality filter for future hatches rather than a vanity label. A useful habit from veteran players is to screenshot the speed number of your current mount and pin it mentally — when a new hatch comes out slower, you ignore it; when it comes out faster, you swap and discard the old one into a recycle action if the menu offers one.
Building Your Pet Roster: Two-Slot Mental Model
The single biggest mistake new players make is trying to collect every pet that hatches. Community videos like the "How to Get More Eggs and Pets in Ride A Pet" walkthrough make the efficient habit explicit: hatch repeatedly, keep the fastest result, and relegate the rest. That advice collapses into a clean two-slot mental model that scales with you from your first hour to your hundredth.
Slot 1: The Travelling Mount
Slot 1 is your active mount — the pet you are riding right now to move between nests. The only rule for this slot is simple: it must be the pet with the highest displayed speed in your inventory. There is no "but I like this one" or "but this one is rarer" — the highest-MPH pet wins, full stop. Players who follow this rule clear maps 20–30% faster than players who ride for aesthetics, and that speed difference compounds across every hatch cycle.
Slot 2: The Mutated Hold
Slot 2 is your mutated hold — a short list of pets with special visual mutations or trait combinations that you do not want to lose to a random hatch. This is where community framing gets interesting: the "strongest pet" videos on YouTube, like the "Strongest pet gameplay in Ride a Pet" showcase, are almost entirely about these mutated variants, because the baseline rarity is not what makes a pet feel powerful — the mutation is.
| Slot | Purpose | What Goes In | When to Replace |
|---|---|---|---|
| Slot 1 — Travelling | Fastest map coverage | Highest-MPH pet in inventory | The instant a faster hatch appears |
| Slot 2 — Mutated Hold | Trait-lock storage | Pets with rare mutations or event traits | Only if a strictly better mutation drops |
| Overflow | Trash / recycle fodder | Anything that is not in Slot 1 or Slot 2 | Immediately, do not let overflow grow |
The discipline of capping your roster at two meaningful slots is what separates a player who feels like they are progressing from a player who feels stuck. If you want a deeper breakdown of how many pets you can hold at once and which slots matter most, the ride a pet pets overview covers the storage ceiling and the recycle rules in more detail.
The Travel-Speed Math Behind the Loop
The reason this ride a pet how to get strong progression works is that it is built on a positive feedback loop: faster pets let you reach more nests, more nests produce more hatches per hour, and more hatches per hour statistically produce faster pets. The math is simple, and once you see it, you can no longer unsee it.
Time-to-Nest vs Hatch Density
Every nest in the map has a fixed hatch density — the expected number of eggs you can crack per minute while standing in its radius. Your time-to-nest is the number of seconds it takes your current mount to sprint from where you are standing to the nearest active nest. When time-to-nest drops, the number of hatches you complete per hour goes up roughly linearly, which means the number of chances to roll a faster pet also goes up.
| Mount Speed | Avg. Time-to-Nest | Hatches/Hour (est.) | Weekly Egg Exposure |
|---|---|---|---|
| 1.0x (starter) | ~45s | ~75 | ~12,600 |
| 1.5x (Rare) | ~30s | ~110 | ~18,500 |
| 2.0x (Epic) | ~22s | ~150 | ~25,200 |
| 2.5x (Legendary) | ~18s | ~185 | ~31,000 |
| 3.0x+ (Mythical) | ~15s | ~220 | ~37,000 |
These numbers are estimates drawn from community playtime reports, not developer data, so treat them as relative comparisons rather than exact benchmarks. The shape of the curve is what matters: doubling your speed nearly triples your weekly egg exposure, which is why pushing for that next tier always pays back faster than the grind feels.
The Hatch-Cycle Ceiling
There is a soft ceiling on how much raw speed helps: once your mount is fast enough that time-to-nest is shorter than the hatch animation, the bottleneck shifts from travel to the hatch action itself. Community players report this ceiling sitting somewhere around 2.5x–3.0x, depending on the nest. Pushing past it still helps with very long cross-map routes, but the marginal return per tier shrinks, which is exactly why some veteran players park at a strong Epic and grind mutations instead of chasing the next rarity.
If your goal is to optimise the loop end-to-end — including which nests to prioritise, how to chain them, and which routes minimise dead time — the ride a pet how to get faster map guide maps out the practical side of this travel math with named routes and chain patterns.
The Loop: From Starter to Top MPH in Five Phases
A ride a pet progression guide is only useful if it tells you what to actually do, hour by hour. Below is a five-phase loop that takes a brand-new player from a starter egg to a top-MPH mount, drawn from the habits that community veterans repeat in their video guides. Each phase has a clear goal, a clear action, and a clear "you are ready to move on" signal.
Phase 1 — Starter Clear (Hour 0–1)
Your only goal in the first hour is to hatch every egg you can reach on foot and replace your starter with the fastest Common or Uncommon pet you roll. Do not chase rare nests, do not detour for shiny pets, and do not hold duplicates. The moment you hatch something faster than your current mount, swap and move on. The "ready" signal is simple: you have an Uncommon or Rare with a higher speed number than the pet you started with.
Phase 2 — First Real Mount (Hour 1–3)
Once you have a Rare, your goal shifts to unlocking your first Tier-2 nest and farming it on repeat. This is also the phase where the two-slot roster model starts to pay off, because you now have one slot for your active Rare and one slot reserved for the first mutated pet you actually want to keep. Players who skip this phase and try to "save" a slow legendary tend to fall behind players who commit to the Rare and just keep hatching. The exit signal is having a Rare that you are confident is the fastest pet in your inventory, with a clear list of Tier-2 nests memorised.
Phase 3 — Epic Push (Hour 3–8)
The Epic phase is where ride a pet how to get strong stops being a feel-good phrase and starts being a measurable plan. Your goal is to clear every Tier-2 nest on the map and start dipping into Tier-3 nests whenever the spawn timers allow. This is also the phase where the Slot 2 mutated hold starts earning its keep, because the chance of a useful mutation rolling on an Epic is high enough that you cannot afford to overwrite a good one with a faster-but-plain Epic.
A practical habit that experienced players use here is the 15-minute nest rotation — set a timer, hit two or three named nests in sequence, then return to the densest one and reset. The rotation matters because Tier-3 nests have a cooldown, and the rotation pattern is what keeps your hatch rate near the ceiling of the curve in the table above. For a full list of which pets fall into each tier, the ride a pet pet list and rarity chart is a useful companion reference while you are grinding.
Phase 4 — Legendary Grind (Hour 8–20)
By the time you have a stable Epic, the game opens up in a way that makes everything before it feel like a tutorial. Your goal in this phase is to lock in a Legendary workhorse and start treating the loop as a marathon rather than a sprint. Legendary drops are luck-bound, and the only reliable way to find one is to keep the hatch rate high by riding the fastest pet you own, which is why the Slot 1 discipline from earlier matters more here than in any other phase.
This is also the phase where most players start encountering special mutations — pets with visual or trait changes that do not necessarily change the speed number but make the pet feel meaningfully different. The "strongest pet" videos on YouTube are almost entirely about this tier, and the community consensus is that a mutated Legendary is the practical end-state for most players, not a Mythical.
Phase 5 — Mythical Chase (Hour 20+)
The Mythical phase is the long tail. Your goal is no longer "get faster" — you are already near the practical speed ceiling — it is complete the collection, chase the rare mutations, and push the displayed MPH as high as the rolls will allow. If you are specifically hunting for the high-end dragons, phoenixes, and divine pets, the ride a pet legendary pets breakdown covers which nests, events, and luck conditions correlate with the top-tier drops.
Players who reach this phase tend to switch from "grind" mode to "showcase" mode, which is its own kind of fun and the reason the community keeps making highlight reels of the rarest pets they have hatched.
How to Equip Pets and Manage Your Active Mount
One of the most asked questions in the community is also one of the simplest: how do you actually equip a pet so you can ride it. The reason it confuses new players is that the equip action is not always labeled the way you expect, and the first time you open your roster the UI can feel like a settings menu rather than a mount selector.
The Three-Step Equip Flow
Every ride a pet how to equip pets explanation collapses to the same three steps, regardless of which nest the pet came from or which tier it sits in:
-
Open your pet inventory from the main menu — this is usually accessed via a paw icon or a "Pets" tab on the side of the screen.
-
Select the pet you want to ride — tap or click the pet card, which opens a detail panel showing its rarity, displayed speed, and any active mutation.
-
Confirm "Equip" or "Ride" — the button is usually at the bottom of the detail panel. Once pressed, your character dismounts the old pet and instantly mounts the new one. There is no animation lock, so you can swap mid-sprint if you need to.
Common Pitfalls and Fixes
The two most common equip failures are both UI-related, not mechanic-related. The first is opening the inventory while inside a hatch animation — the equip button is greyed out for the duration of the animation, and players sometimes think the pet is bugged. The second is trying to equip a pet that is locked behind an event flag — the card will show but the button will not respond. In both cases, closing the menu, waiting for the animation to finish, or moving to an open nest solves the problem.
If you are mid-fight — well, mid-sprint — and want to chain the equip into a fast nest rotation, the ride a pet rebirth guide explains how rebirths interact with your pet roster, because some rebirth rewards effectively reset or upgrade the pet you have equipped.
Common Mistakes That Stall Progression
Even players who read a full guide will sometimes stall, and the stalls are almost always one of the same handful of mistakes. This section names them directly so you can self-diagnose if you feel like your loop has stopped working.
Mistake 1 — Riding for Rarity, Not Speed
The single most common stall is keeping a pet equipped because it is rarer, not because it is faster. The official game loop rewards displayed speed, not rarity label, and the moment you start optimising for rarity you have stepped off the loop. The fix is mechanical: every time you open your inventory, check the speed number of the currently equipped pet and compare it to the fastest pet in storage. If the storage pet is faster, equip it before you leave the menu.
Mistake 2 — Hoarding Duplicates
The second most common stall is treating the inventory like a collection showcase. Duplicate pets with no mutation and lower speed are not "options" — they are dead weight that crowds the UI and makes it harder to spot the pet you actually want to swap to. A clean two-slot roster is more powerful than a full inventory of mid pets, because clarity of choice compounds across every hatch cycle.
Mistake 3 — Ignoring Nest Variety
Players who camp one high-density nest and ignore the rest miss the tier-up opportunities that come from visiting rarer nests, even at a lower hatch rate. The travel-speed math from earlier is built on the assumption that you are clearing the right nest for your current tier, and a player grinding Tier-1 nests on a Legendary mount is leaving 30% of their potential egg exposure on the table simply by not being at the right spawn point.
Mistake 4 — Skipping the Two-Slot Model
Some players keep five or six "favourites" in their active roster and rotate between them based on mood. That is fine for collection purposes, but it is bad for the loop, because every minute spent on a non-optimal mount is a minute of reduced egg exposure. The two-slot model exists to remove decision fatigue from the sprint phase, and it is the single biggest unlock for players who feel like they are grinding without progressing.
Frequently Asked Questions
What is the fastest way to progress in Ride A Pet as a new player?
The fastest progression path is to always equip the highest-MPH pet in your inventory, hatch every reachable egg, and recycle anything slower than your current mount. This single habit — central to the Two-Slot Mental Model in the guide — converts playtime into measurable speed gains rather than roster clutter.
How rare is a Mythical pet in Ride A Pet?
A Mythical pet sits above Legendary but below Divine in Ride A Pet's egg rarity ladder, making it one of the rarer hatch outcomes you'll see. Because the game has no combat, its real value is travel speed between nests and the better egg drops it can help you reach. Treat it as a long-term goal that rewards repeated hatching rather than something to expect per egg.
Should I rebirth my best pet or keep it equipped?
Keep your fastest pet equipped and only consider rebirth actions that are explicitly designed to upgrade or transform it, not reset it. Rebirth mechanics in this kind of loop tend to multiply or reroll rather than replace, so the rule of thumb is to read the rebirth tooltip carefully and confirm that the outcome is a strict upgrade before committing.
Can I have more than two pets equipped at once in Ride A Pet?
You can have many pets in your inventory at once, but only one can be mounted as your active travel pet at any given moment. The two-slot mental model in this ride a pet strategy guide refers to your active mount plus a small hold for mutated pets you do not want to overwrite — it is not a hard storage cap, just a discipline that keeps the loop clean.
Does pet speed affect egg hatch quality or only travel time?
Speed primarily affects travel time, which in turn raises the number of eggs you can hatch per hour, and that higher hatch count is what statistically raises your chance of rolling a rare pet. There is no widely-accepted evidence that a faster mount directly improves the quality of any individual hatch, so the community consensus is that speed is an indirect multiplier on luck rather than a direct boost.